It might be messy, and it might be crumbly, but this scone recipe is worth spilling some flour over.
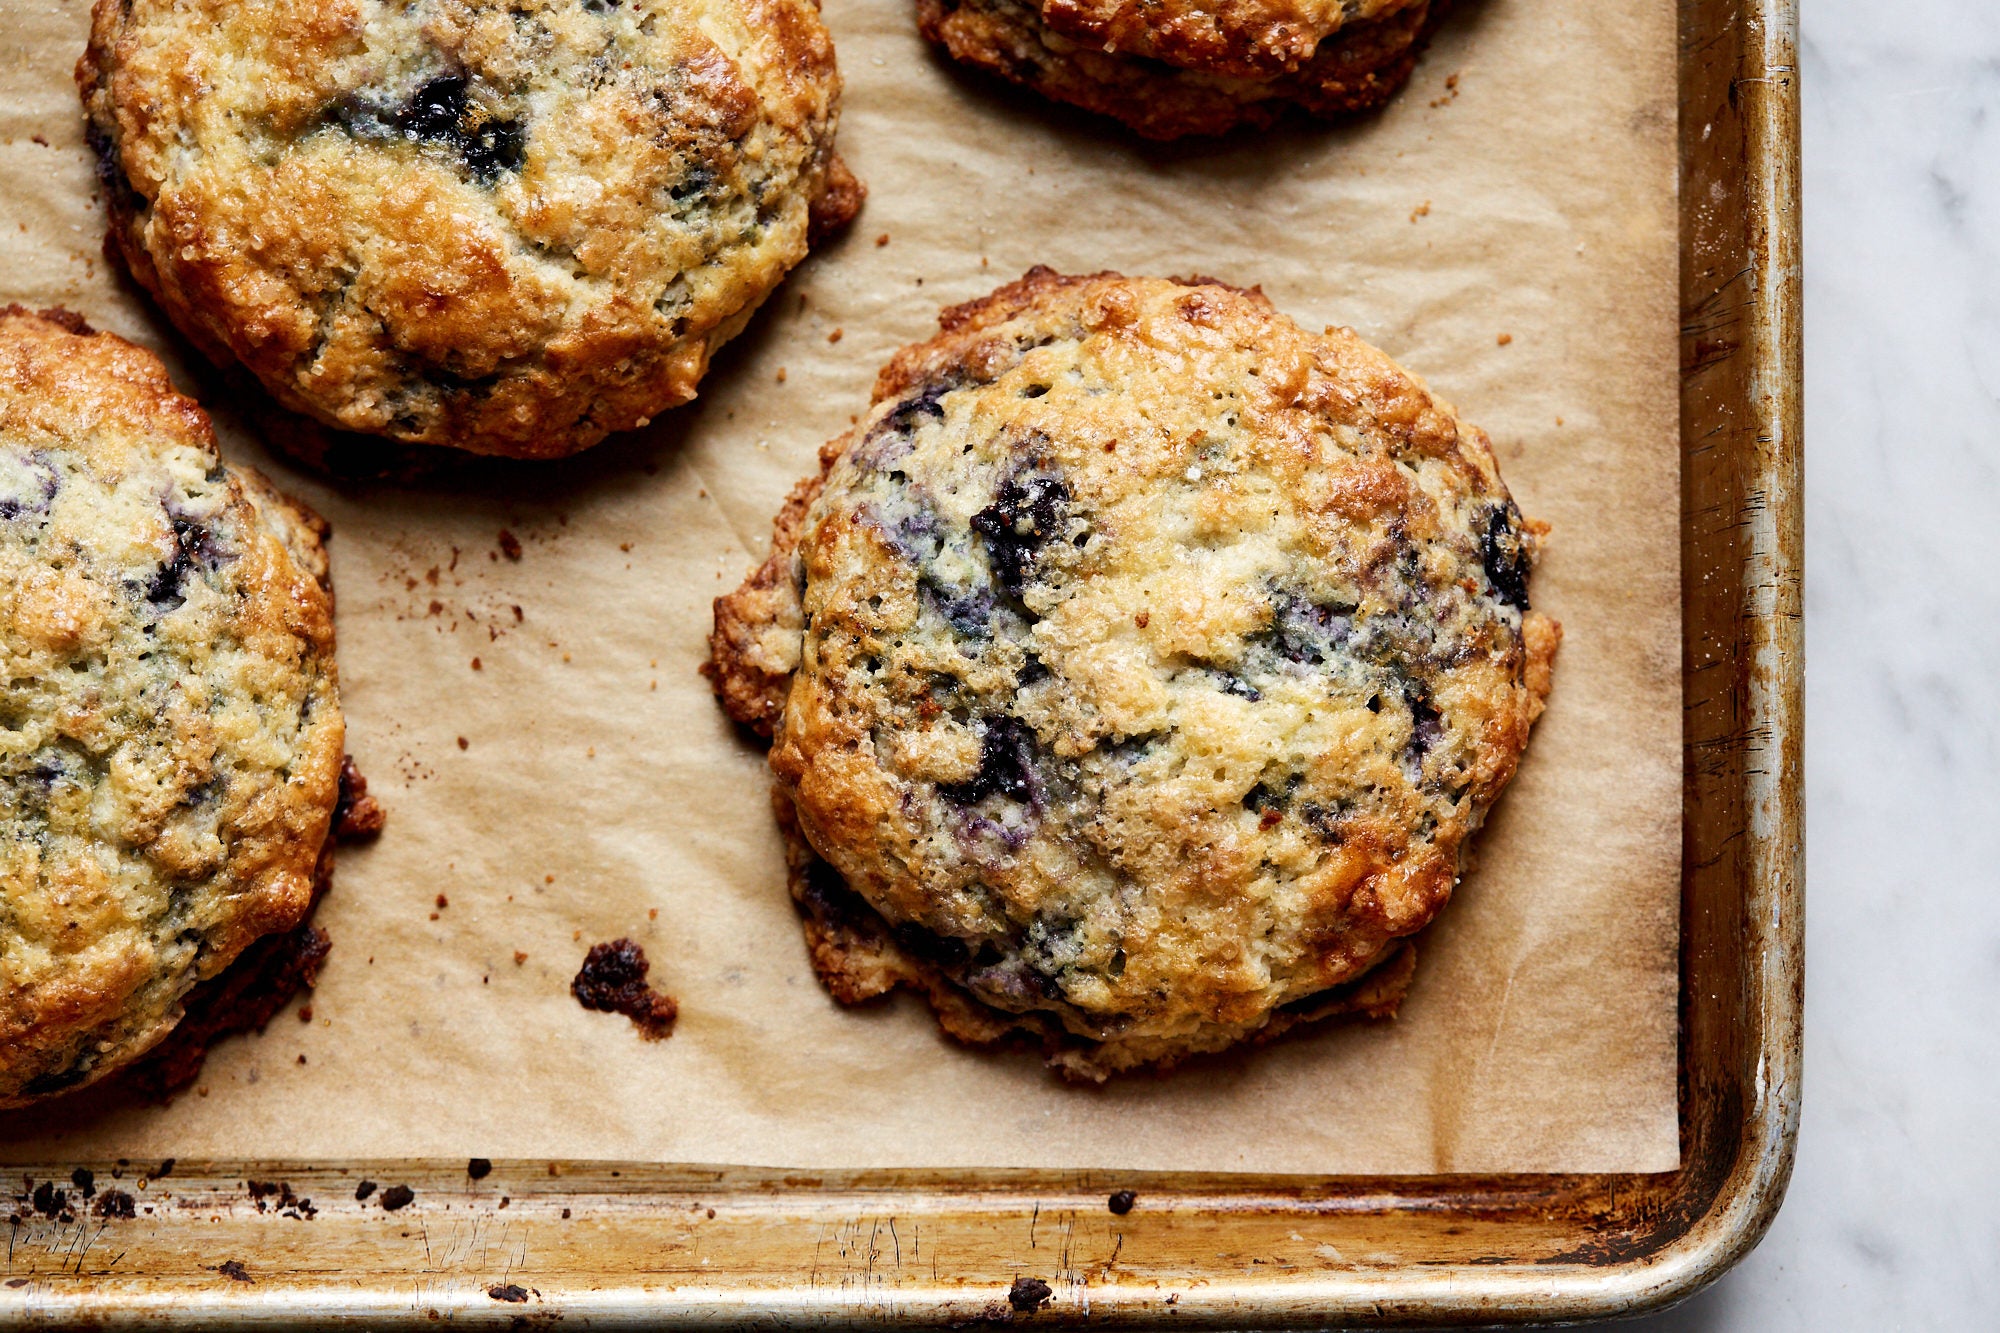
About four and a half years ago, I stumbled upon a scone recipe that has ruined me for all scones, if not all breakfast baked goods. And I exaggerate only a little. These scones have the most tender of crumbs and taste luxuriously—and equally—of vanilla and butter. Their richness is cut with pockets of tart, yet sweet, berries, but not so many that the fruit overpowers. Their sugary tops provide a crunchy texture to offset the aforementioned soft middles.
Everyone to whom I have ever served them adores them, expressing their love in the most hyperbolic of terms.
The original recipe came from the The Big Sur Bakery Cookbook via The Kitchn. I was drawn to how large and craggy they were—bursting with dark purple berries and crowned with the aforementioned generous sprinkling of sparkly coarse sugar. The recipe’s ingredient list was short (a major plus in my book) and the instructions simple and one-bowl (ish). I followed the recipe to a tee and was rewarded with the most buttery, tender-crumbed, vanilla-infused, sweet, yet not overwhelmingly so, berry-studded scones I had ever tasted, and there are several reasons why.
First, the recipe calls for more sugar than most scones do (a full cup), as well as more butter, copious amounts of pure vanilla extract (two tablespoons), frozen berries, and no eggs. Scones with less sugar and vanilla than these often taste flat, and when a scone is not made with enough butter, it lacks both tenderness and richness. Finally, while they help to bind the dough, eggs make scones a lot more dense. In short, these are not your local bakery’s run-of-the mill scones—they don’t need to be dressed up with a glaze or sweetened with a slather of jam.
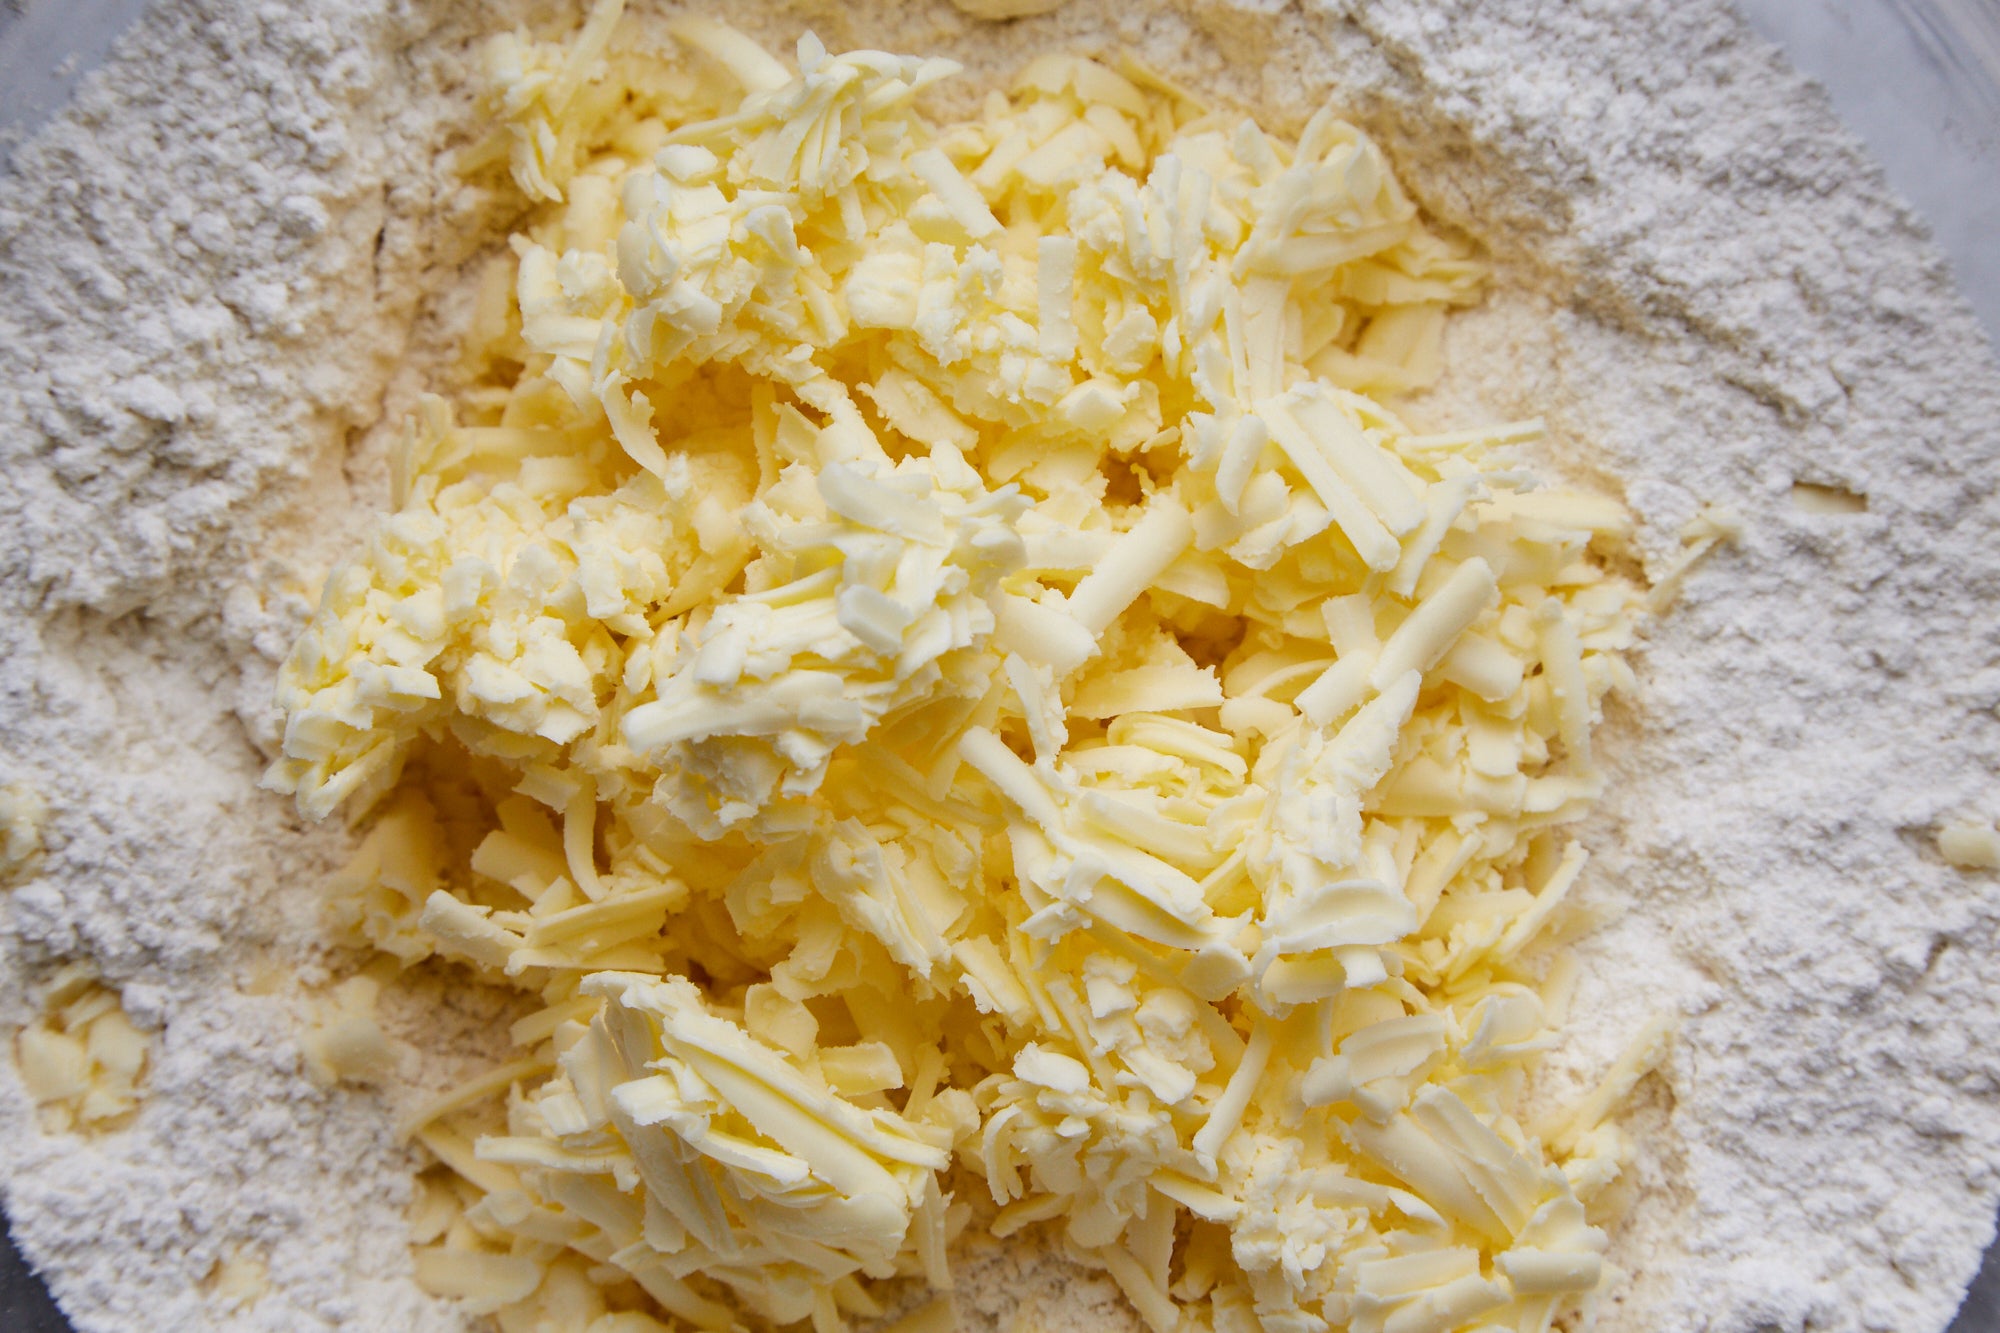
But the technique is what truly brings these scones to the realm of the ethereal. The dough is never kneaded (and thus tough, overworked scones are a distant nightmare), just gently stirred with a wooden spoon. The chunks of (cold) butter remain obviously visible in the dough right through the shaping of the scones. A short rest is suggested after stirring—in order for the flour to hydrate. In my version of the recipe, I suggest you extend this to an overnight sleepover in the fridge as you might with a puck of pie dough.
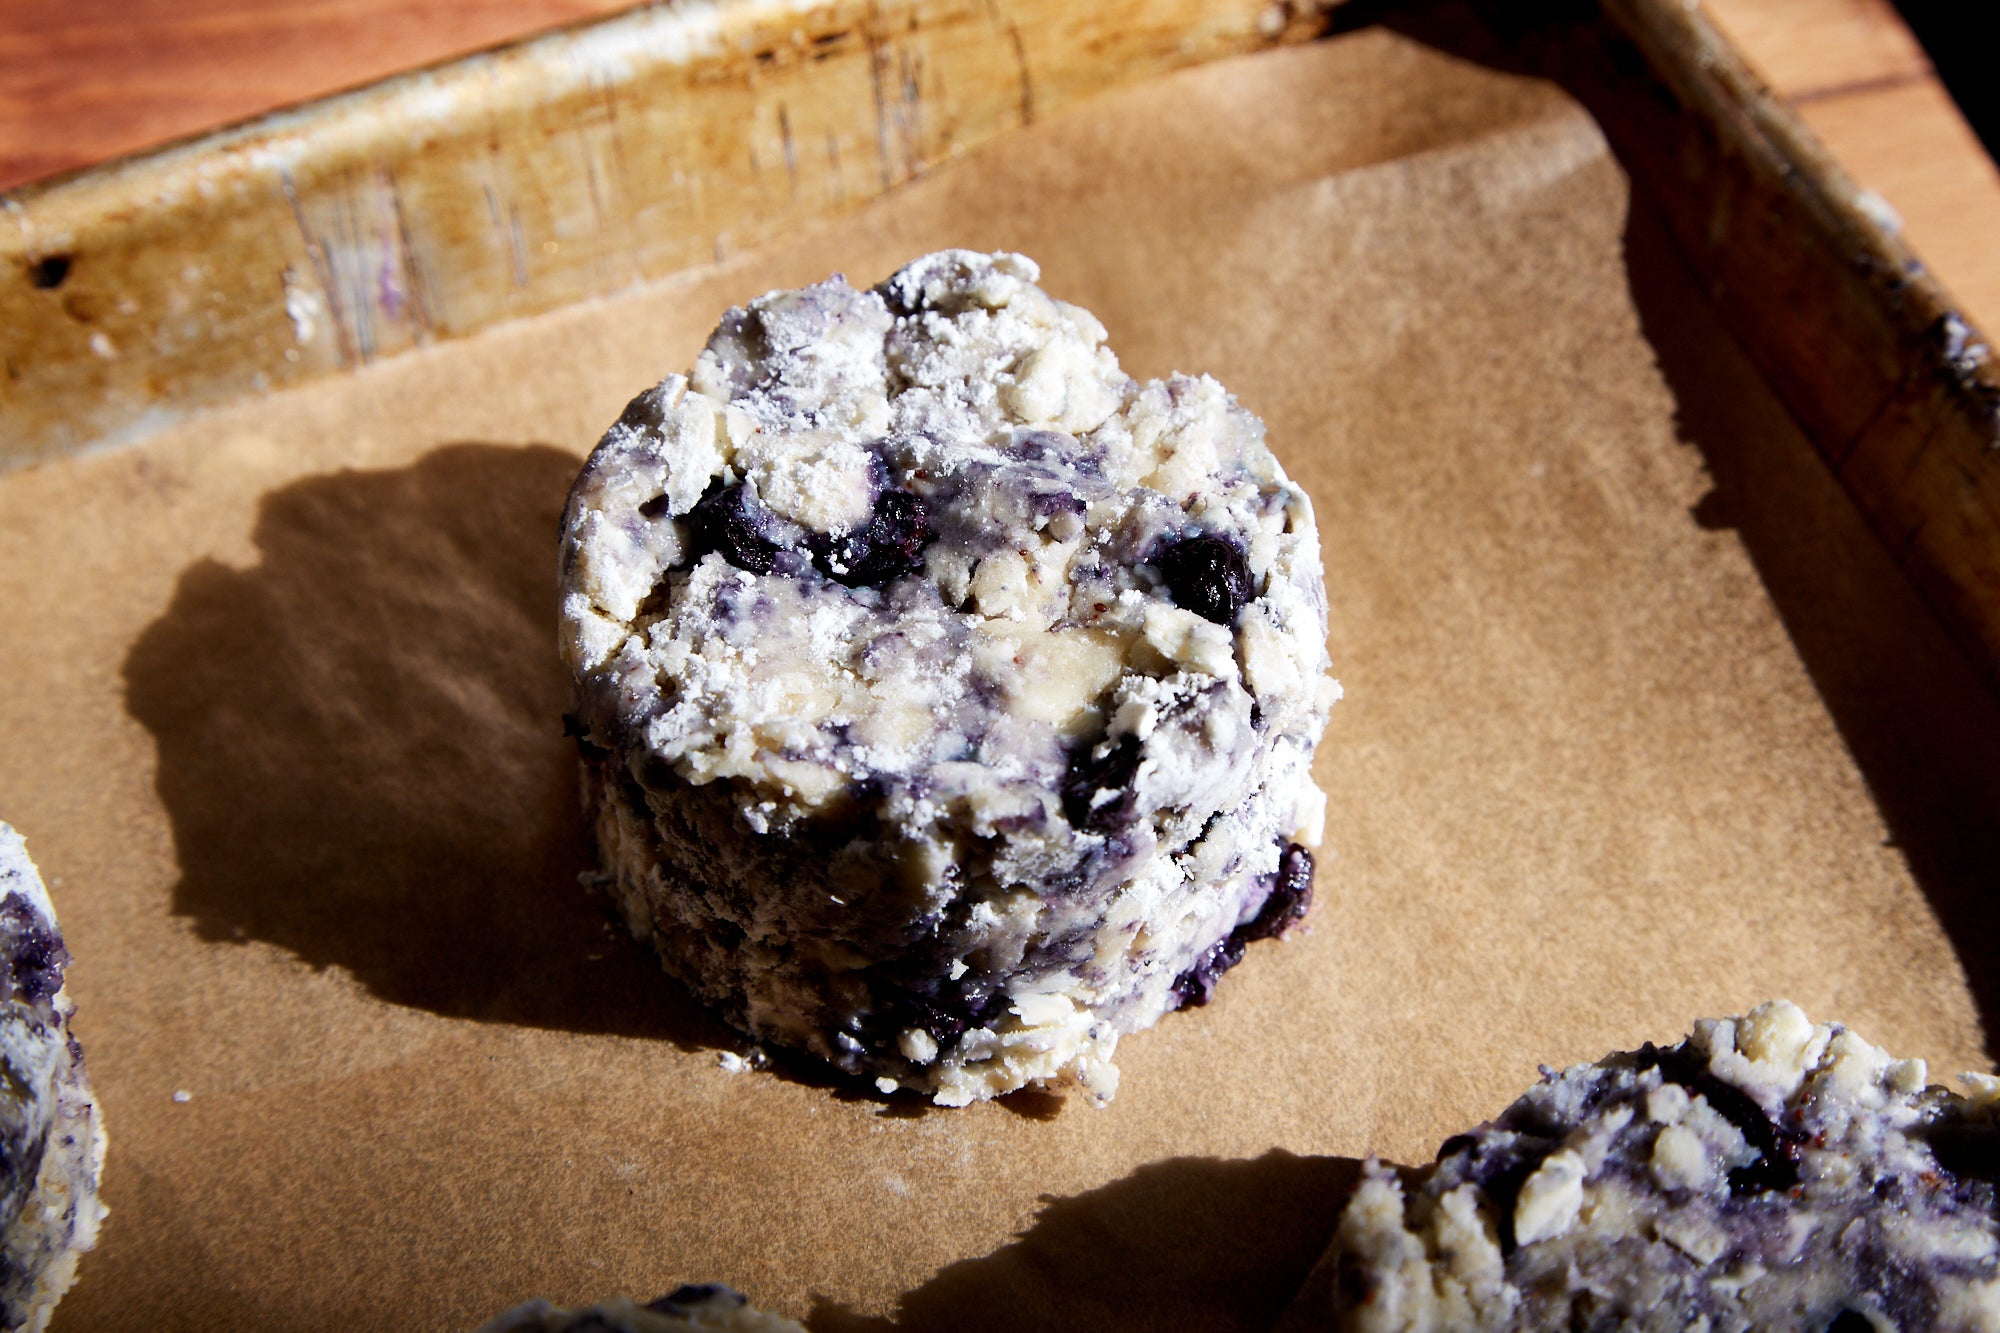
Shaping the dough is when things get really interesting. With a two-inch wide cookie or biscuit cutter in one hand and a big-ish handful of the still quite crumbly, not at all cohesive, dough in the other, you smoosh the dough into the cutter until quite compact—think hockey puck. You then carefully push the “puck” out of the cutter and onto your prepared cookie sheet. Now, I’d be straight-up lying if I told you this were easy or foolproof. In fact, often the dough is so crumbly that a puck or two may just collapse onto the sheet after being released from the cutter. But do not be disheartened (or mad at me) or attempt to add extra liquid. Merely collect the crumbs and try again. Dipping the cutter in flour can help, but remember: Any frustration you feel while doing this is to be expected and will be totally worth it in the end. I promise.
For, as tricky as this scone-shaping may be, the texture that this hardly-fiddled-with dough produces, coupled with the vanilla’s strong presence and the tang from crème fraîche (my substitution for the buttermilk called for in the original), makes any difficulties during the shaping process a distant memory.
Additionally, I have a couple of tricks that I have woven into my own version of the recipe that may help. First, I grate the cold butter on the large holes of a box grater, which facilitates the speed with which it is incorporated into the dry ingredients (no need for a pastry cutter, etc.) and keeps the butter colder for longer. This extra time makes shaping the pucks much easier. Once shaped, I recommend freezing the scones for at least several hours, if not overnight, before baking them off. The scones do a mighty fine job of keeping their shape if baked from frozen solid, with the added benefit of getting all the work done the night before so you get fresh scones in the morning.
I’ve also tweaked the recipe to call for self-rising flour, rather than using all-purpose mixed with salt and baking powder, as the flavor (no hint of soapy bitterness from the leavening) and lift from self-rising cannot be beat. I call for a combo of crème fraîche and heavy cream for the original’s buttermilk, which adds flavor that is both rich and tart. And finally, I insist upon egg-washing the scones—which can be difficult due to their aforementioned crumbly tops but is so worth it for the golden color.
Is the process of making these scones just the tiniest bit, shall we say, drawn out, what with an overnight rest in the fridge and then one in the freezer? Yes, but once you’ve made scones this way, I guarantee you’ll never look back.